Posts

Simple car racing android game in Sketchware

Image
To create a simple car racing game in sketchware follow the steps given below. 1. Create a new project in Sketchware. 2. In VIEW area of main.xml add a TextView textview3 for displaying score of previous game, a TextView textview4 for displaying high score, and a Button button1 for starting game. 3. In MainActivity , add a Shared Preferences component sp:sp . 4. Add onStart event and put blocks to set the text of textview3 and textview4 . 5. Create a new page page2.xml . 6. On button1 click use intent to move to page2 . 7. On page2.xml add a LinearV linear1 with padding 0 and width and height MATCH_PARENT. 8. In Page2Activity , add a Shared Preferences component sp:sp . 9. Create a number variable highscore . 10. In onCreate event of Page2Activity , use blocks to set the value of number variable highscore , and use codes to create a new GameView and add it to linear1 , as shown in image below. The code used in the add source directly bloc...
Showing Images in GridView

Image
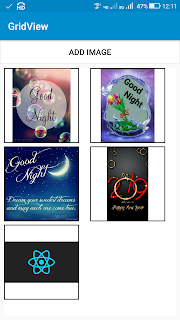
Here we create an app in Sketchware which will display the images picked using FilePicker in a GridView. And on clicking the GridView item, it will display a dialog box asking if we want to delete the image. To create such app, follow the steps given below. 1. Create a new project in Sketchware. 2. In VIEW area add a Button button1 and a LinearV linear1 . 3. Add a FilePicker component picker  with mime type  image/* . 4. Create a number variable n , a List Map maplist , and a List String slist . 5. In the event  on button1 Click  , use the block FilePicker  picker  pick files. This will open the gallery when button1 is clicked, and allow users to pick images. 6. In EVENT area add a new event  FilePicker onFilesPicked  under  Component  section. 7. In the event  FilePicker onFilesPicked  use the blocks as shown in image below, to get the path of selected images to maplist . Then use codes to disp...

Create a Stopwatch App using Chronometer in Sketchware

Image
To create a Stopwatch App in sketchware using Chronometer, follow the steps given below. 1. Create a new project in Sketchware. 2. In VIEW area add a LinearV with width and height as match_parent, and gravity as center_horizontal, center_vertical. • Inside this add a LinearH linear2 with width 240, height 240, padding 20, magin 8, and gravity center_horizontal, center_vertical. • Below linear2, add two Buttons start_button and pause_button . Set their margins as 8 and text as START and PAUSE respectively. 3. Create a more block  extra . 4. In the more block  extra , use an  add source directly  blocks and put codes to declare a long variable timeWhenStopped, and a Chronometer stopclock. } private long timeWhenStopped = 0; private Chronometer stopclock; { 5. Add 5 number variables mode , ZERO , RUNNING , STOPPED , PAUSED . 6. In  onCreate  event, set ZERO to 0, RUNNING to 1, STOPPED to 2, PAUSED to 3, and mode to ZERO. After ...

Create Bluetooth ON/OFF Switch

Image
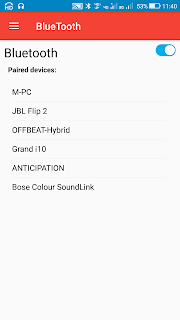
To create a Bluetooth ON/OFF switch in Sketchware android project follow the steps given below. 1. In VIEW area of your sketchware android project, insert a LinearH and inside it insert a Switch  switch1 . For switch1 write text as ' Bluetooth ', set width as match_parent, and set gravity as left. 2. Add a BluetoothConnect component bt . 3. Add onResume event and here use blocks to set the checked state of switch1 as per the state of bluetooth. 4. Create a more block  setBluetooth<enable>  and define it by putting following code in an add source directly block. android.bluetooth.BluetoothAdapter bluetoothAdapter = android.bluetooth.BluetoothAdapter.getDefaultAdapter(); boolean isEnabled = bluetoothAdapter.isEnabled(); if (_enable && !isEnabled) { bluetoothAdapter.enable(); } else if(!_enable && isEnabled) { bluetoothAdapter.disable(); } 5. In switch1 onCheckChanged use block the setBluetooth Block to set the bluetooth...

Create Android Digital Clock App in Sketchware

Image
To create a simple Digital Clock android app in sketchware, or to display time in your android app, follow the instructions given below. 1. Create a new android project in Sketchware. 2. In VIEW area add a LinearV linear1 . For linear1 set gravity to center_vertical. Inside linear1 , add a LinearH linear2 . 3. In LOGIC area, open onCreate event. Insert an add source directly block from operator section. In this add source directly block put codes provided below. TextClock clock = new TextClock(this); clock.setTextSize(50); clock.setTextColor(Color.RED); clock.setFormat24Hour("dd MMM yyyy hh:mm:ss cccc"); linear2.addView(clock); This code creates a new TextClock clock . Then sets the text size and text color for the TextClock , sets the format for the TextClock , and adds the TextClock to linear2 . For symbols which can be used in clock format visit http://www.sketchwarehelp.com/2017/07/list-of-calendar-format-symbols-valid.html?m=1  4. Save and run ...

Age Calculator App in Sketchware

Image
To create an Age Calculator App using DatePickerDialog in Sketchware follow the steps given below. 1. In VIEW area of your sketchware android project, insert three TextViews textview_dob , textview_age_days , textview_age , and an ImageView  imageview1 . 2. Create a more block  extra . 3. In the more block  extra  use  add source directly  block and put following code. } public static class DatePickerFragment extends androidx.appcompat.app.AppCompatDialogFragment implements DatePickerDialog.OnDateSetListener { @Override public Dialog onCreateDialog(Bundle savedInstanceState) { final Calendar c = Calendar.getInstance(); int year = c.get(Calendar.YEAR); int month = c.get(Calendar.MONTH); int day = c.get(Calendar.DAY_OF_MONTH); return new DatePickerDialog(getActivity(), this, year, month, day); } public void onDateSet(DatePicker view, int year, int month, int day) { int mon = month +1; Calendar now = Calendar.getInstance(); Calendar birthDay = Ca...

TimePickerDialog in Sketchware

Image
To create a TimePickerDialog in Sketchware android project follow the steps given below. 1. In VIEW area of your sketchware android project, insert a LinearH and inside it insert a TextView  textview1 , and a Button  button1 . For textview1 write text as ' 00:00 '. 2. Create a more block extra . 3. In the more block extra use add source directly block and put following code. } public static class TimePickerFragment extends DialogFragment implements TimePickerDialog.OnTimeSetListener { @Override public Dialog onCreateDialog(Bundle savedInstanceState) { final Calendar c = Calendar.getInstance(); int hour = c.get(Calendar.HOUR_OF_DAY); int minute = c.get(Calendar.MINUTE); return new TimePickerDialog(getActivity(), this, hour, minute, android.text.format.DateFormat.is24HourFormat(getActivity())); } public void onTimeSet(TimePicker view, int hourOfDay, int minute) { TextView textview101 = getActivity().findViewById(R.id.textview1); textview101.s...

Automatic text switching using ViewFlipper in Sketchware

Image
In Sketchware, to display a list of sentences one by one by automatically switching to next sentence every few seconds, follow the steps given below. 1. In Sketchware project, in main.xml add a LinearLayout linear1 , with width and height as MATCH_PARENT. Set a beautiful image as background of linear1. 2. Add a CustomView customview.xml. In this add a TextView textview1 , with text size 40, width and height MATCH_PARENT, and gravity center_horizontal, center_vertical. 3. Add a String List string_list . 4. In onCreate , one by one add sentences to this list. 5. After adding items to string_list, use add source directly block and put following code in it. ViewFlipper viewFlipper = new ViewFlipper(this); LinearLayout.LayoutParams layoutParams = new LinearLayout.LayoutParams(ViewGroup.LayoutParams.MATCH_PARENT, ViewGroup.LayoutParams.WRAP_CONTENT); layoutParams.setMargins(20, 20, 20, 20); layoutParams.gravity = Gravity.CENTER; viewFlipper.setLayoutParams(layoutPar...

TextInputLayout in Sketchware

Image
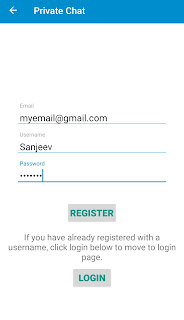
To create an EditText with animation features, we can use the EditText in a TextInputLayout which is a Layout interface in android.support.design.widget library. In Sketchware we cannot add it in xml file but we can create it programmatically. Follow the instructions given below for a simple example. 1. In VIEW area of your project add a Linear vertical  linear7  and inside this add three EditText fields  edit_email, edit_username, and edit_password . For the three EditText fields set hint as Email, Username and Password respectively. 2. Switch On AppCompat and design . 3. In onCreate event, i. Use codes to remove all Views from linear7 . linear7.removeAllViews(); ii. Define a TextInputLayout textinput1 , and add edit_email to it. com.google.android.material.textfield.TextInputLayout textinput1 = new com.google.android.material.textfield.TextInputLayout(this); textinput1.addView(edit_email); iii. Define a TextInputLayout textinput2 , and...

Retrieve Device Build Information in Sketchware

Image
To retrieve Build information about the device we can use the android.os.Build class. 1. Create a new project in Sketchware. 2. In VIEW area add a TextView for each parameter to be retrieved. We can retrieve Device, Model, Product, Manufacturer, Brand, API level, Board, Bootloader, Display, Fingerprint, Hardware, Host, and Id. 3. Add following String variables: device, model, product, manufacturer, brand, api_level, board, boot, display, fingerprint, hardware, host, and id. 4. In onCreate event use add source directly block and put following code. device = android.os.Build.DEVICE; model = android.os.Build.MODEL; product = android.os.Build.PRODUCT; manufacturer = android.os.Build.MANUFACTURER; brand = android.os.Build.BRAND; api_level = android.os.Build.VERSION.SDK; board = android.os.Build.BOARD; boot = android.os.Build.BOOTLOADER; display = android.os.Build.DISPLAY; fingerprint = android.os.Build.FINGERPRINT; hardware = android.os.Build.HARDWARE; host = a...