Posts

Showing posts from January, 2019

Showing Images in GridView

Image
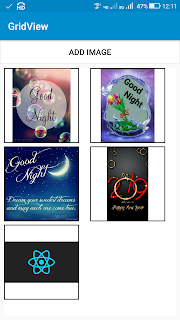
Here we create an app in Sketchware which will display the images picked using FilePicker in a GridView. And on clicking the GridView item, it will display a dialog box asking if we want to delete the image. To create such app, follow the steps given below. 1. Create a new project in Sketchware. 2. In VIEW area add a Button button1 and a LinearV linear1 . 3. Add a FilePicker component picker  with mime type  image/* . 4. Create a number variable n , a List Map maplist , and a List String slist . 5. In the event  on button1 Click  , use the block FilePicker  picker  pick files. This will open the gallery when button1 is clicked, and allow users to pick images. 6. In EVENT area add a new event  FilePicker onFilesPicked  under  Component  section. 7. In the event  FilePicker onFilesPicked  use the blocks as shown in image below, to get the path of selected images to maplist . Then use codes to display the selected images in gridview1 . gridview1.setAdapte

Create a Stopwatch App using Chronometer in Sketchware

Image
To create a Stopwatch App in sketchware using Chronometer, follow the steps given below. 1. Create a new project in Sketchware. 2. In VIEW area add a LinearV with width and height as match_parent, and gravity as center_horizontal, center_vertical. • Inside this add a LinearH linear2 with width 240, height 240, padding 20, magin 8, and gravity center_horizontal, center_vertical. • Below linear2, add two Buttons start_button and pause_button . Set their margins as 8 and text as START and PAUSE respectively. 3. Create a more block  extra . 4. In the more block  extra , use an  add source directly  blocks and put codes to declare a long variable timeWhenStopped, and a Chronometer stopclock. } private long timeWhenStopped = 0; private Chronometer stopclock; { 5. Add 5 number variables mode , ZERO , RUNNING , STOPPED , PAUSED . 6. In  onCreate  event, set ZERO to 0, RUNNING to 1, STOPPED to 2, PAUSED to 3, and mode to ZERO. After this use an  add source direc

Create Bluetooth ON/OFF Switch

Image
To create a Bluetooth ON/OFF switch in Sketchware android project follow the steps given below. 1. In VIEW area of your sketchware android project, insert a LinearH and inside it insert a Switch  switch1 . For switch1 write text as ' Bluetooth ', set width as match_parent, and set gravity as left. 2. Add a BluetoothConnect component bt . 3. Add onResume event and here use blocks to set the checked state of switch1 as per the state of bluetooth. 4. Create a more block  setBluetooth<enable>  and define it by putting following code in an add source directly block. android.bluetooth.BluetoothAdapter bluetoothAdapter = android.bluetooth.BluetoothAdapter.getDefaultAdapter(); boolean isEnabled = bluetoothAdapter.isEnabled(); if (_enable && !isEnabled) { bluetoothAdapter.enable(); } else if(!_enable && isEnabled) { bluetoothAdapter.disable(); } 5. In switch1 onCheckChanged use block the setBluetooth Block to set the bluetooth on or

Create Android Digital Clock App in Sketchware

Image
To create a simple Digital Clock android app in sketchware, or to display time in your android app, follow the instructions given below. 1. Create a new android project in Sketchware. 2. In VIEW area add a LinearV linear1 . For linear1 set gravity to center_vertical. Inside linear1 , add a LinearH linear2 . 3. In LOGIC area, open onCreate event. Insert an add source directly block from operator section. In this add source directly block put codes provided below. TextClock clock = new TextClock(this); clock.setTextSize(50); clock.setTextColor(Color.RED); clock.setFormat24Hour("dd MMM yyyy hh:mm:ss cccc"); linear2.addView(clock); This code creates a new TextClock clock . Then sets the text size and text color for the TextClock , sets the format for the TextClock , and adds the TextClock to linear2 . For symbols which can be used in clock format visit http://www.sketchwarehelp.com/2017/07/list-of-calendar-format-symbols-valid.html?m=1  4. Save and run