Creating a Drawing View in Sketchware
To create a DrawingView with undo button, follow the instructions given below.
1. Create a new project in Sketchware.
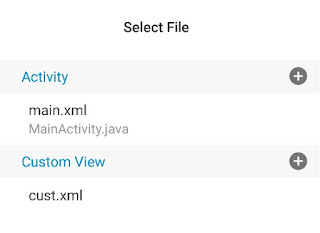
2. In main.xml, add a LinearLayout linear1 with height wrap_content, weight 1, and padding 0. Add a LinearHorizontal below it, containing following ImageViews: imageview_stroke_width, imageview_stroke_color, imageview_background, imageview_undo, and imageview_clear.
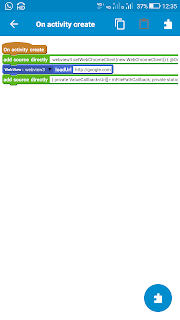
3. Create a more block canvas and put following codes in it. Here we create a new View class called DrawingView and a new class called PathPaint.
}
DrawingView dv;
private Paint mPaint;
private Canvas mCanvas;
private ArrayList<PathPaint> all_paths = new ArrayList<>();
private Paint mPaint;
private Canvas mCanvas;
private ArrayList<PathPaint> all_paths = new ArrayList<>();
public class DrawingView extends View {
private Bitmap mBitmap;
private Paint mBitmapPaint;
Context context;
private Paint circlePaint;
private Path circlePath;
private Path mPath;
private Bitmap mBitmap;
private Paint mBitmapPaint;
Context context;
private Paint circlePaint;
private Path circlePath;
private Path mPath;
public DrawingView(Context c) {
super(c);
context=c;
mPath = new Path();
mBitmapPaint = new Paint(Paint.DITHER_FLAG);
circlePath = new Path();
circlePaint = new Paint();
circlePaint.setAntiAlias(true);
circlePaint.setColor(Color.BLUE); circlePaint.setStyle(Paint.Style.STROKE); circlePaint.setStrokeJoin(Paint.Join.MITER); circlePaint.setStrokeWidth(1f);
}
@Override
protected void onSizeChanged(int w, int h, int oldw, int oldh) {
super.onSizeChanged(w, h, oldw, oldh);
mBitmap = Bitmap.createBitmap(w, h, Bitmap.Config.ARGB_8888);
mCanvas = new Canvas(mBitmap);
}
protected void onSizeChanged(int w, int h, int oldw, int oldh) {
super.onSizeChanged(w, h, oldw, oldh);
mBitmap = Bitmap.createBitmap(w, h, Bitmap.Config.ARGB_8888);
mCanvas = new Canvas(mBitmap);
}
@Override
protected void onDraw(Canvas canvas) {
super.onDraw(canvas);
canvas.drawBitmap( mBitmap, 0, 0, mBitmapPaint); canvas.drawPath(mPath, mPaint); canvas.drawPath(circlePath, circlePaint);
invalidate();
}
protected void onDraw(Canvas canvas) {
super.onDraw(canvas);
canvas.drawBitmap( mBitmap, 0, 0, mBitmapPaint); canvas.drawPath(mPath, mPaint); canvas.drawPath(circlePath, circlePaint);
invalidate();
}
private float mX, mY;
private static final float TOUCH_TOLERANCE = 4;
@Override
public boolean onTouchEvent(MotionEvent event) {
float x = event.getX();
float y = event.getY();
switch (event.getAction()) {
case MotionEvent.ACTION_DOWN:
mPath.reset();
mPath.moveTo(x, y);
mX = x;
mY = y;
invalidate();
break;
case MotionEvent.ACTION_MOVE:
float dx = Math.abs(x - mX);
float dy = Math.abs(y - mY);
if (dx >= TOUCH_TOLERANCE || dy >= TOUCH_TOLERANCE) {
mPath.quadTo(mX, mY, (x + mX)/2, (y + mY)/2);
mX = x;
mY = y;
circlePath.reset(); circlePath.addCircle(mX, mY, 30, Path.Direction.CW);
}
invalidate();
break;
case MotionEvent.ACTION_UP:
mPath.lineTo(mX, mY); circlePath.reset();
Path p = new Path(mPath);
Paint pnt = new Paint(mPaint);
all_paths.add(new PathPaint(p, pnt));
mCanvas.drawPath(mPath, mPaint);
mPath.reset();
invalidate();
break;
}
return true;
}
public void undo(){
mPath.reset();
mCanvas.drawColor(Color.TRANSPARENT, PorterDuff.Mode.CLEAR);
for (PathPaint pp : all_paths) {
mCanvas.drawPath(pp.getPath(), pp.getPaint());
}
invalidate();
}
mPath.reset();
mCanvas.drawColor(Color.TRANSPARENT, PorterDuff.Mode.CLEAR);
for (PathPaint pp : all_paths) {
mCanvas.drawPath(pp.getPath(), pp.getPaint());
}
invalidate();
}
}
public class PathPaint {
Path p;
Paint pnt;
public PathPaint(Path p, Paint pnt){
this.p = p;
this.pnt = pnt;
}
public Path getPath(){
return p;
}
public Paint getPaint(){
return pnt;
}
}
Path p;
Paint pnt;
public PathPaint(Path p, Paint pnt){
this.p = p;
this.pnt = pnt;
}
public Path getPath(){
return p;
}
public Paint getPaint(){
return pnt;
}
}
{
4. Put following codes in onCreate.
dv = new DrawingView(this);
linear1.addView(dv);
linear1.addView(dv);
mPaint = new Paint();
mPaint.setAntiAlias(true); mPaint.setDither(true); mPaint.setColor(Color.BLACK); mPaint.setStyle(Paint.Style.STROKE); mPaint.setStrokeJoin(Paint.Join.ROUND); mPaint.setStrokeCap(Paint.Cap.ROUND);
mPaint.setStrokeWidth(12);
mPaint.setStrokeWidth(12);
5. Create a custom View color_dialog.xml. Add a LinearLayout linear1. Inside this add LinearLayouts with different colors, and a LinearLayout linear_select for displaying selected color.
6. Create a Dialog component dialog.
7. In imageview_stroke_color onClick event,
* Add Dialog dialog set title "Choose color" block.
* Add following codes in add source directly:
View d_view = getLayoutInflater().inflate(R.layout.color_dialog, null);
LinearLayout dialog_linear1 = d_view.findViewById(R.id.linear1);
final LinearLayout selectedColor = d_view.findViewById(R.id.linear_select);
selectedColor.setBackgroundColor(mPaint.getColor());
for (int i = 0;
i < dialog_linear1.getChildCount();
i++){
for (int j = 0;
j < ((LinearLayout)dialog_linear1.getChildAt(i)).getChildCount();
j++){
((LinearLayout)dialog_linear1.getChildAt(i)).getChildAt(j).setOnClickListener(new View.OnClickListener(){
@Override
public void onClick(View v){
selectedColor.setBackgroundColor(((ColorDrawable)v.getBackground()).getColor());
}
});
}
}
dialog.setView(d_view);
* Add Dialog dialog OK button click block. Inside this use add source directly block and put following codes:
mPaint.setColor(
((ColorDrawable)selectedColor.getBackground()).getColor());
* Add Dialog dialog CANCEL button click block.
* Add Dialog dialog show block.
8. In imageview_background onClick event,
* Add Dialog dialog set title "Choose color" block.
* Add following codes in add source directly:
View d_view = getLayoutInflater().inflate(R.layout.color_dialog, null);
LinearLayout dialog_linear1 = d_view.findViewById(R.id.linear1);
final LinearLayout selectedColor = d_view.findViewById(R.id.linear_select);
selectedColor.setBackgroundColor(((ColorDrawable)linear1.getBackground()).getColor());
for (int i = 0;
i < dialog_linear1.getChildCount();
i++){
for (int j = 0;
j < ((LinearLayout)dialog_linear1.getChildAt(i)).getChildCount();
j++){
((LinearLayout)dialog_linear1.getChildAt(i)).getChildAt(j).setOnClickListener(new View.OnClickListener(){
@Override
public void onClick(View v){
selectedColor.setBackgroundColor(((ColorDrawable)v.getBackground()).getColor());
}
});
}
}
dialog.setView(d_view);
* Add Dialog dialog OK button click block. Inside this use add source directly block and put following codes:
linear1.setBackgroundColor(((ColorDrawable)selectedColor.getBackground()).getColor());
* Add Dialog dialog CANCEL button click block.
* Add Dialog dialog show block.
9. Create a new Dialog component dialog2.
10. In imageview_stroke_width onClick event,
* Add Dialog dialog2 set title "Set stroke width" block.
* Add following codes in add source directly:
final String[] mylist = {"4", "8", "12", "16", "20", "24", "28" };
dialog2.setItems(mylist, new DialogInterface.OnClickListener() {
@Override
public void onClick(DialogInterface _dialog, int _which) {
mPaint.setStrokeWidth((int)Double.parseDouble(mylist[_which]));
}
});
* Add Dialog dialog2 show block.
11. In imageview_undo onClick event, put following codes:
if (all_paths.size() > 0){
all_paths.remove(all_paths.size() - 1);
dv.undo();
}
12. In imageview_clear onClick event, put following codes:
mCanvas.drawColor(Color.TRANSPARENT, PorterDuff.Mode.CLEAR);
all_paths.clear();
13. Save and run the project.


How to save and edit later though?
ReplyDeleteI keep getting color drawable not resolved
ReplyDeleteInstead of
DeleteColorDrawable
write android.graphics.drawable.ColorDrawable
Je veux savoir comment créé un appwidget ( une application widget) avec sketchware. Merci
ReplyDeleteSir I need help can you please tell me how to load an url in customer view.
ReplyDeleteDrawing is my hobby but i don't have proper information how to create a draw view in sketch but your post has made my task very easy. Your written point number 3 which is about( Create a more block canvas and put following codes) is comprehensive. I have also collected information about drawing view from this website www.dissertationwritingservicess.co.uk
ReplyDeleteHi, is there a way to save all your tutorials? I'm afraid this site would shut down at anytime
ReplyDeleteWrite more blog post about sketchware. Like sql etc.
ReplyDeleteBig fan sir
This comment has been removed by the author.
ReplyDeleteThis comment has been removed by the author.
ReplyDeleteMust be 21 years of age or older and present legitimate ID and 24K Select Club® Card to take part in promotions. Visit 24K Select Club for full guidelines and particulars for all promotions. Events and dates are subject to vary or cancellation with out prior notice. Participation is predicated solely on availability and management discretion. Promotional Free Play prizes will expire on the end of the gaming day. Wulfert E, Franco C, Williams K, Roland B, Maxson JH. The role of money 카지노사이트 in the pleasure of gambling.
ReplyDeleteHey there, Sketchware Help! Thank you for sharing this informative article about creating a drawing view in Sketchware. As someone who is interested in creating mobile applications, I find this topic particularly fascinating.
ReplyDeleteDissertation Writing Services UK
Your article provides a clear and concise guide on how to implement a drawing view using Sketchware. I appreciate how you broke down the process into manageable steps, making it easier for beginners to follow along. The screenshots and detailed explanations were also helpful in understanding each step of the process. I like how you provided alternative methods for accomplishing the same task, allowing users to choose the option that works best for them.
Your article provides a clear and concise guide on how to implement a drawing view using Sketchware. I appreciate how you broke down the process into manageable steps, making it easier for beginners to follow along. The screenshots and detailed explanations were also helpful in understanding each step of the process. I like how you provided alternative methods for accomplishing the same task, Chaos Animeallowing users to choose the option that works best for them.
ReplyDelete